
Getting Started with Soon
Create schedules for your team, manage employees, track their shifts and more.
With Soon you will be able to create a work schedule by making shifts, assigning people to them and tracking changing as you go along. As you go along you will find features to make your schedule even faster. More importantly, is that your team will now have a solid process to rely on when it comes to daily operations.
What to expect from Soon
An online schedule that your employees can access from anywhere and always be up to date. Soon works on desktop, tabled and smartphones.
Use Templates to define and use standard shifts specific to your business
Export the hours that were scheduled and the times that people actually worked. So you can use this for pay-rolling or create your own statistics based on it.
STEP 1: Request your account
Send us a message to start a free trail at [email protected] and tell a bit about yourself. You’ll get an email from us, just follow the steps in the instructions.
Pro tip Customise your account by adding a team logo, we've seen that this has a big impact on the next step.
STEP 2: Invite your Co-Workers
Next thing you want to do is adding other people to your team. This allows you to use them on the schedule you make and automatically creates their personalised work schedule for them. You can also give some people admin privileges, so they can help you make and manage the schedules.
STEP 3: Create your first Schedule
Start a new schedule by clicking the New board tile when you are on the boards page.
You can give this schedule a name under
Settings>Board Info>Board nameClick on the blue plus icon in one of the day columns. This allows you to create an event and guides you through what you need to provide.
What - give a name to your shift e.g. "Opening" or "Morning shift" or "Shift A". Alternatively you can just give it a descriptive title if it is a one-off event, such as "Onboarding customers Seminar".
When - the times you want people to start and end this shift or event.
Where - this is optional, you can set a location to clarify where it takes place.
Now we have come to the "Group" segment of the event. This allows you to group people based on their position. You can make several of these by hitting "add group" at the bottom.
Add a role - You can assign people to a position to tell them their responsibility
Add people - Here you select who of your team members (from step 2) will be assigned to this role in the event you are creating.
When ready, just click next to the box and the event will be created. If you made a mistake along the way and want to start over just hit esc on your keyboard.
STEP 4: Create more events
Just repeat what you did for step 3. Try to use the tab and arrow keys and you will notice things go very fast when you only use your keyboard.
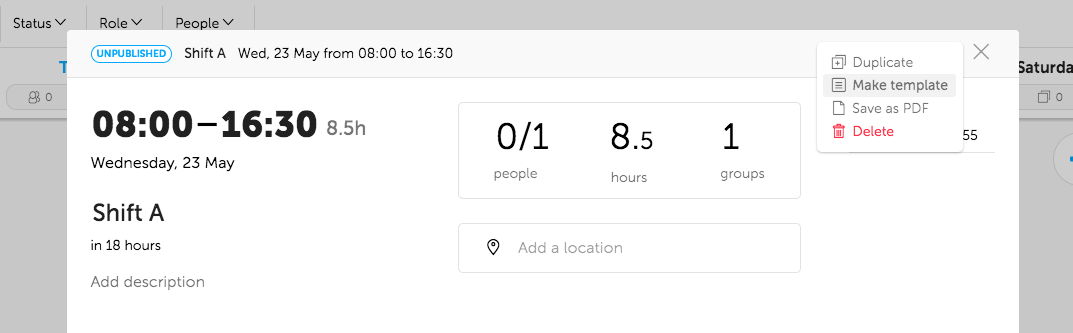
If you have many similar shifts, you can make a template of it. Just click on a shift to open the details then hit the "more options" icon ⋮ > Make template .
STEP 5: Publish the events
When you're happy with your schedule, send it out to everyone. You can do this one-by-one if you click the publish button under each event, or all-at-once if you click the publish button in the bottom left of the screen.
Everyone now has their personal schedule by going to Schedule in the team Menu. If you put yourself on some events you can also check your own schedule.
What’s next?
Speed things up further by using
Week templates.Learn how to install the app on your phone and send this link to your co-workers.
Create standard
rolesandlocationsto enhance your team's schedule even further.
Last updated